Building Your Own Electrolysis Machine for Permanent Hair Removal
When it comes to permanent hair removal, the U.S. Food and Drug Administration (FDA) recognizes only one method as truly permanent: electrolysis. This technique involves inserting a fine needle into a hair follicle, then applying heat or an electric current to destroy the follicle's root. Commercially, this service can be costly, but a DIY enthusiast known as n3tcat has demonstrated that it's possible to construct a personal electrolysis device at home. This article explores the science behind galvanic electrolysis, the step-by-step build process, and important safety considerations.
Understanding Galvanic Electrolysis
How It Works
Galvanic electrolysis uses a low-level direct current (DC) to generate a chemical reaction inside the hair follicle. A needle probe delivers current, while a neutral electrode (often a metal plate or can) completes the circuit. The current converts salt and water in the follicle into sodium hydroxide (lye), a caustic substance that chemically destroys the hair matrix.
The Chemical Process
The amount of lye produced depends on two factors: the current intensity and the duration of application. More lye increases the likelihood of permanent follicle destruction, but excessive current can damage surrounding skin, cause scarring, or increase pain. Finding the right balance is critical for effective and safe treatment.
Safety Considerations
Because electrolysis involves inserting a needle into the skin, it carries inherent risks such as infection, scarring, and skin burns. DIY builders must use sterilized needles, control current precisely, and avoid treating sensitive or damaged areas. Using a foot pedal to activate current, as n3tcat did, helps maintain steady control.
From Battery to Microcontroller: Building the Device
The Initial Prototype
n3tcat first experimented with a simple setup: a 12-volt car battery connected to a standard electrolysis needle. The neutral electrode was an aluminum can held by the person receiving treatment. By varying how tightly the can was grasped, the current could be adjusted. Despite its crudeness, this rig successfully removed several hairs.
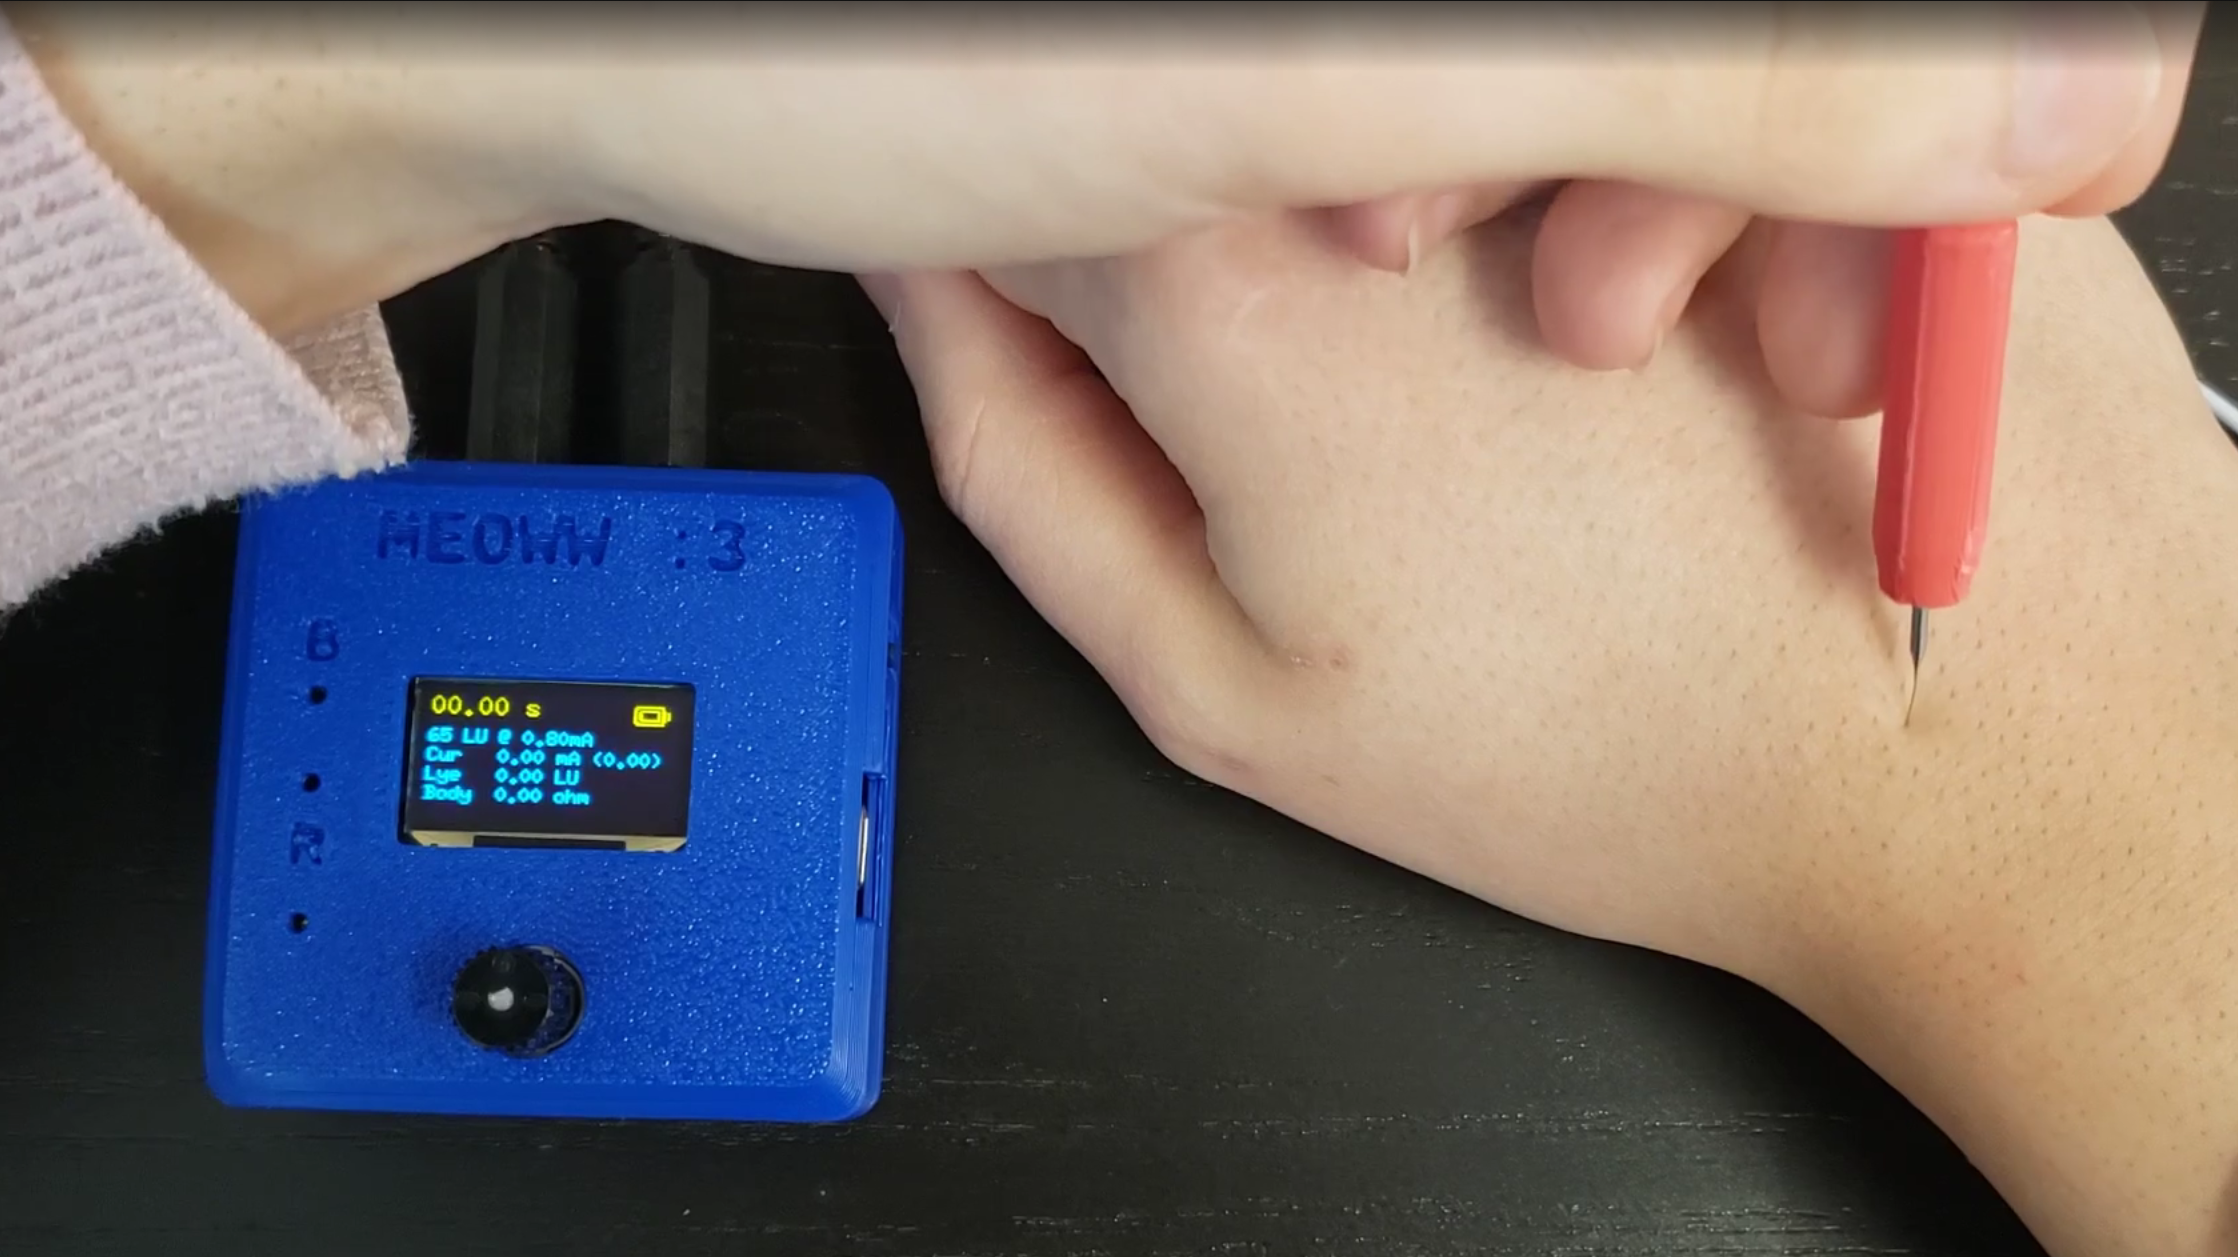
The Upgraded Design with RP2040
Seeking better precision and safety, n3tcat created a more sophisticated device powered by an RP2040 microcontroller. A 3.7-volt lithium rechargeable battery supplies power, which a boost converter raises to about 15 volts for the needle. The microcontroller manages current via a DAC and an LM358 op-amp feeding a MOSFET, with feedback from a dedicated ADC for real-time monitoring. An OLED screen and a rotary encoder form the user interface, while a foot pedal triggers the current. The needle is housed in a 3D-printed pen-like handle for ergonomic placement.

Components and Construction
The entire system is mounted on a custom PCB and enclosed in a 3D-printed case. n3tcat has made all design files publicly available, allowing others to replicate or modify the build. Key components include:
- Microcontroller: RP2040 (Raspberry Pi Pico)
- Power: 3.7V Li‑ion battery
- Boost converter: Adjustable to ~15V output
- Current control: DAC + LM358 op‑amp + MOSFET
- Interface: OLED display, rotary encoder, foot pedal
- Needle: Standard electrolysis probe with 3D‑printed handle
Practical Considerations
Cost Savings
Professional electrolysis can cost thousands of dollars, especially for large areas. A DIY machine can be built for a fraction of that expense, with components readily available from electronics suppliers. However, the builder must invest time in assembly and calibration.
Risks and Precautions
Home electrolysis is not without risks. Improper current levels can cause burns, scarring, or pigment changes. Sterility is crucial to avoid infection. Beginners should practice on small, low‑risk areas and seek guidance from experienced practitioners. n3tcat emphasizes the importance of taking proper precautions to avoid self‑harm.
Conclusion
Building a DIY electrolysis machine offers an affordable path to permanent hair removal, but it demands careful design and strict adherence to safety protocols. n3tcat's project demonstrates that with a basic understanding of electronics and electrolysis, anyone can create a functional device. While the finished product may not rival commercial machines, it provides a viable alternative for those willing to learn and take precautions. As with any home medical project, safety first—and happy hacking!
Related Articles
- New Life for an Old Drug: DFMO Brings Hope to Children with Bachmann-Bupp Syndrome
- 6 Unseen Realities Faced by Older Homeless Women
- The Perplexing Case of Darkening Skin: A Medication's Unseen Side Effect
- Breakthrough Study Reveals Why Ozempic Yields Dramatically Different Results Among Patients
- 10 Surprising Mental Health Benefits of GLP-1 Drugs Like Ozempic
- How to Mitigate the Global Threat of Pathogenic Amoebas: A Practical Guide
- From Nuclear Waste to Lifesaving Drugs: The Race to Secure Radioactive Isotopes
- Navigating FDA Regulations on Compounding Obesity Drugs: A Step-by-Step Guide